Making a rubber band helicopter is a great project for parents and children to work on together. This project exercises fine motor skills, following step by step directions and teaches a bit about physics.
Materials
- A regular drinking straw
- A 25-inch long piece of wire (for example a thin bicycle spoke) or very supple piece of
bamboo or a long drinking straw - 3-inch long rubber band
- A length of cotton yarn, string or twine
- Glue
- Tape
- Paper clip
- A thick piece of paper, at least 12 inches long
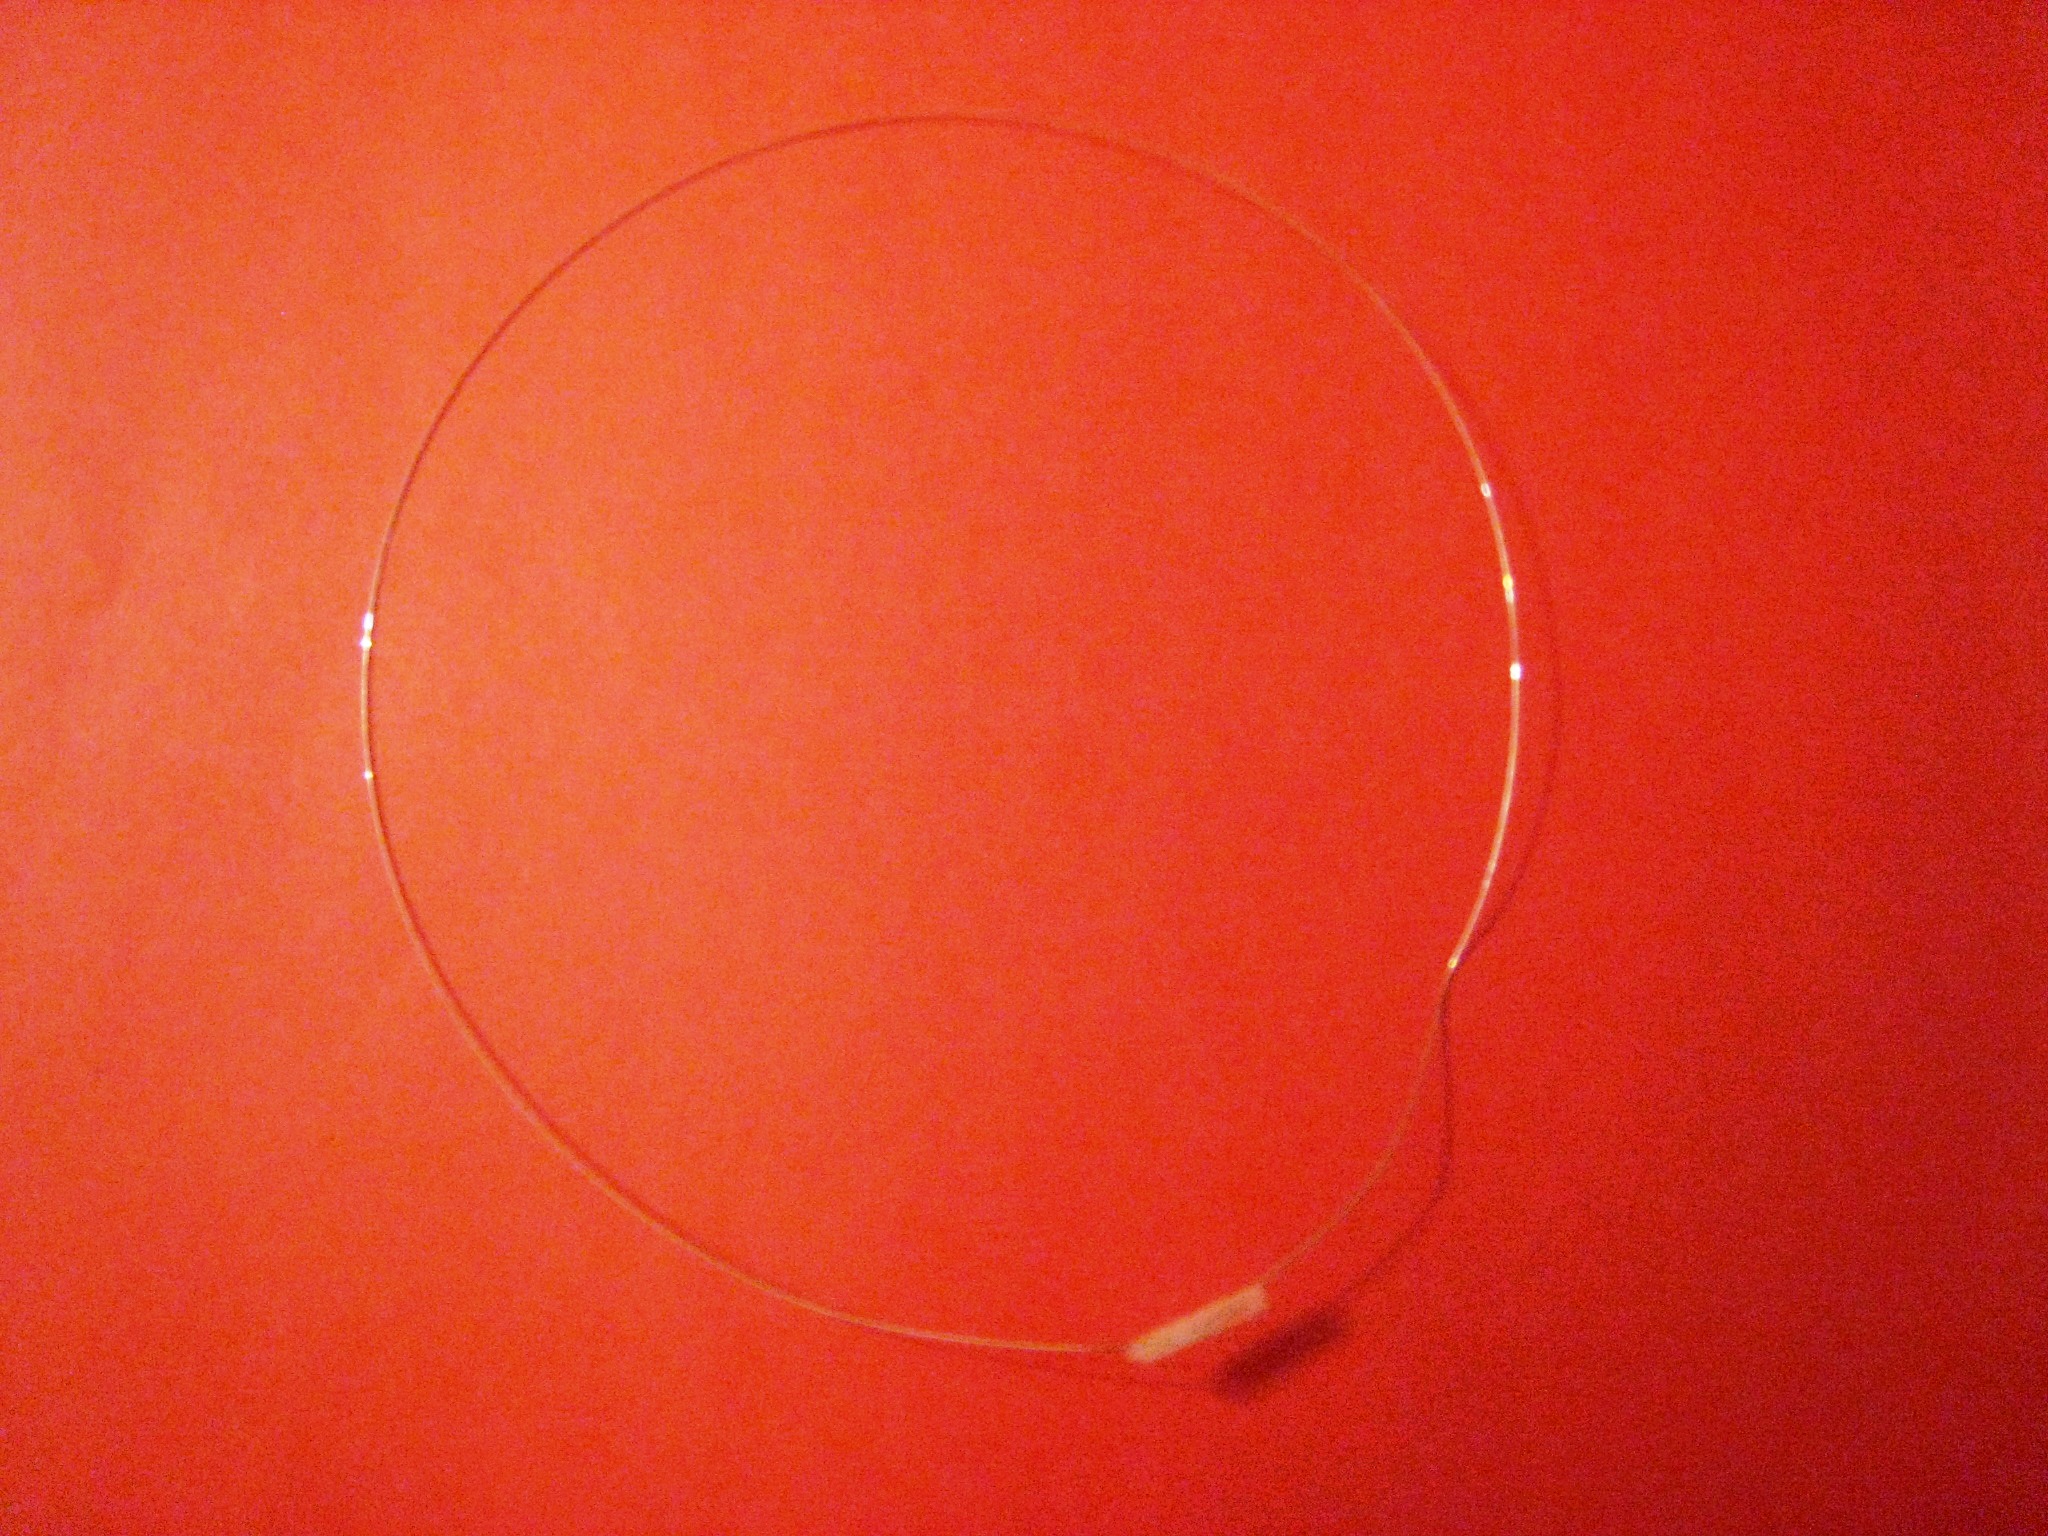
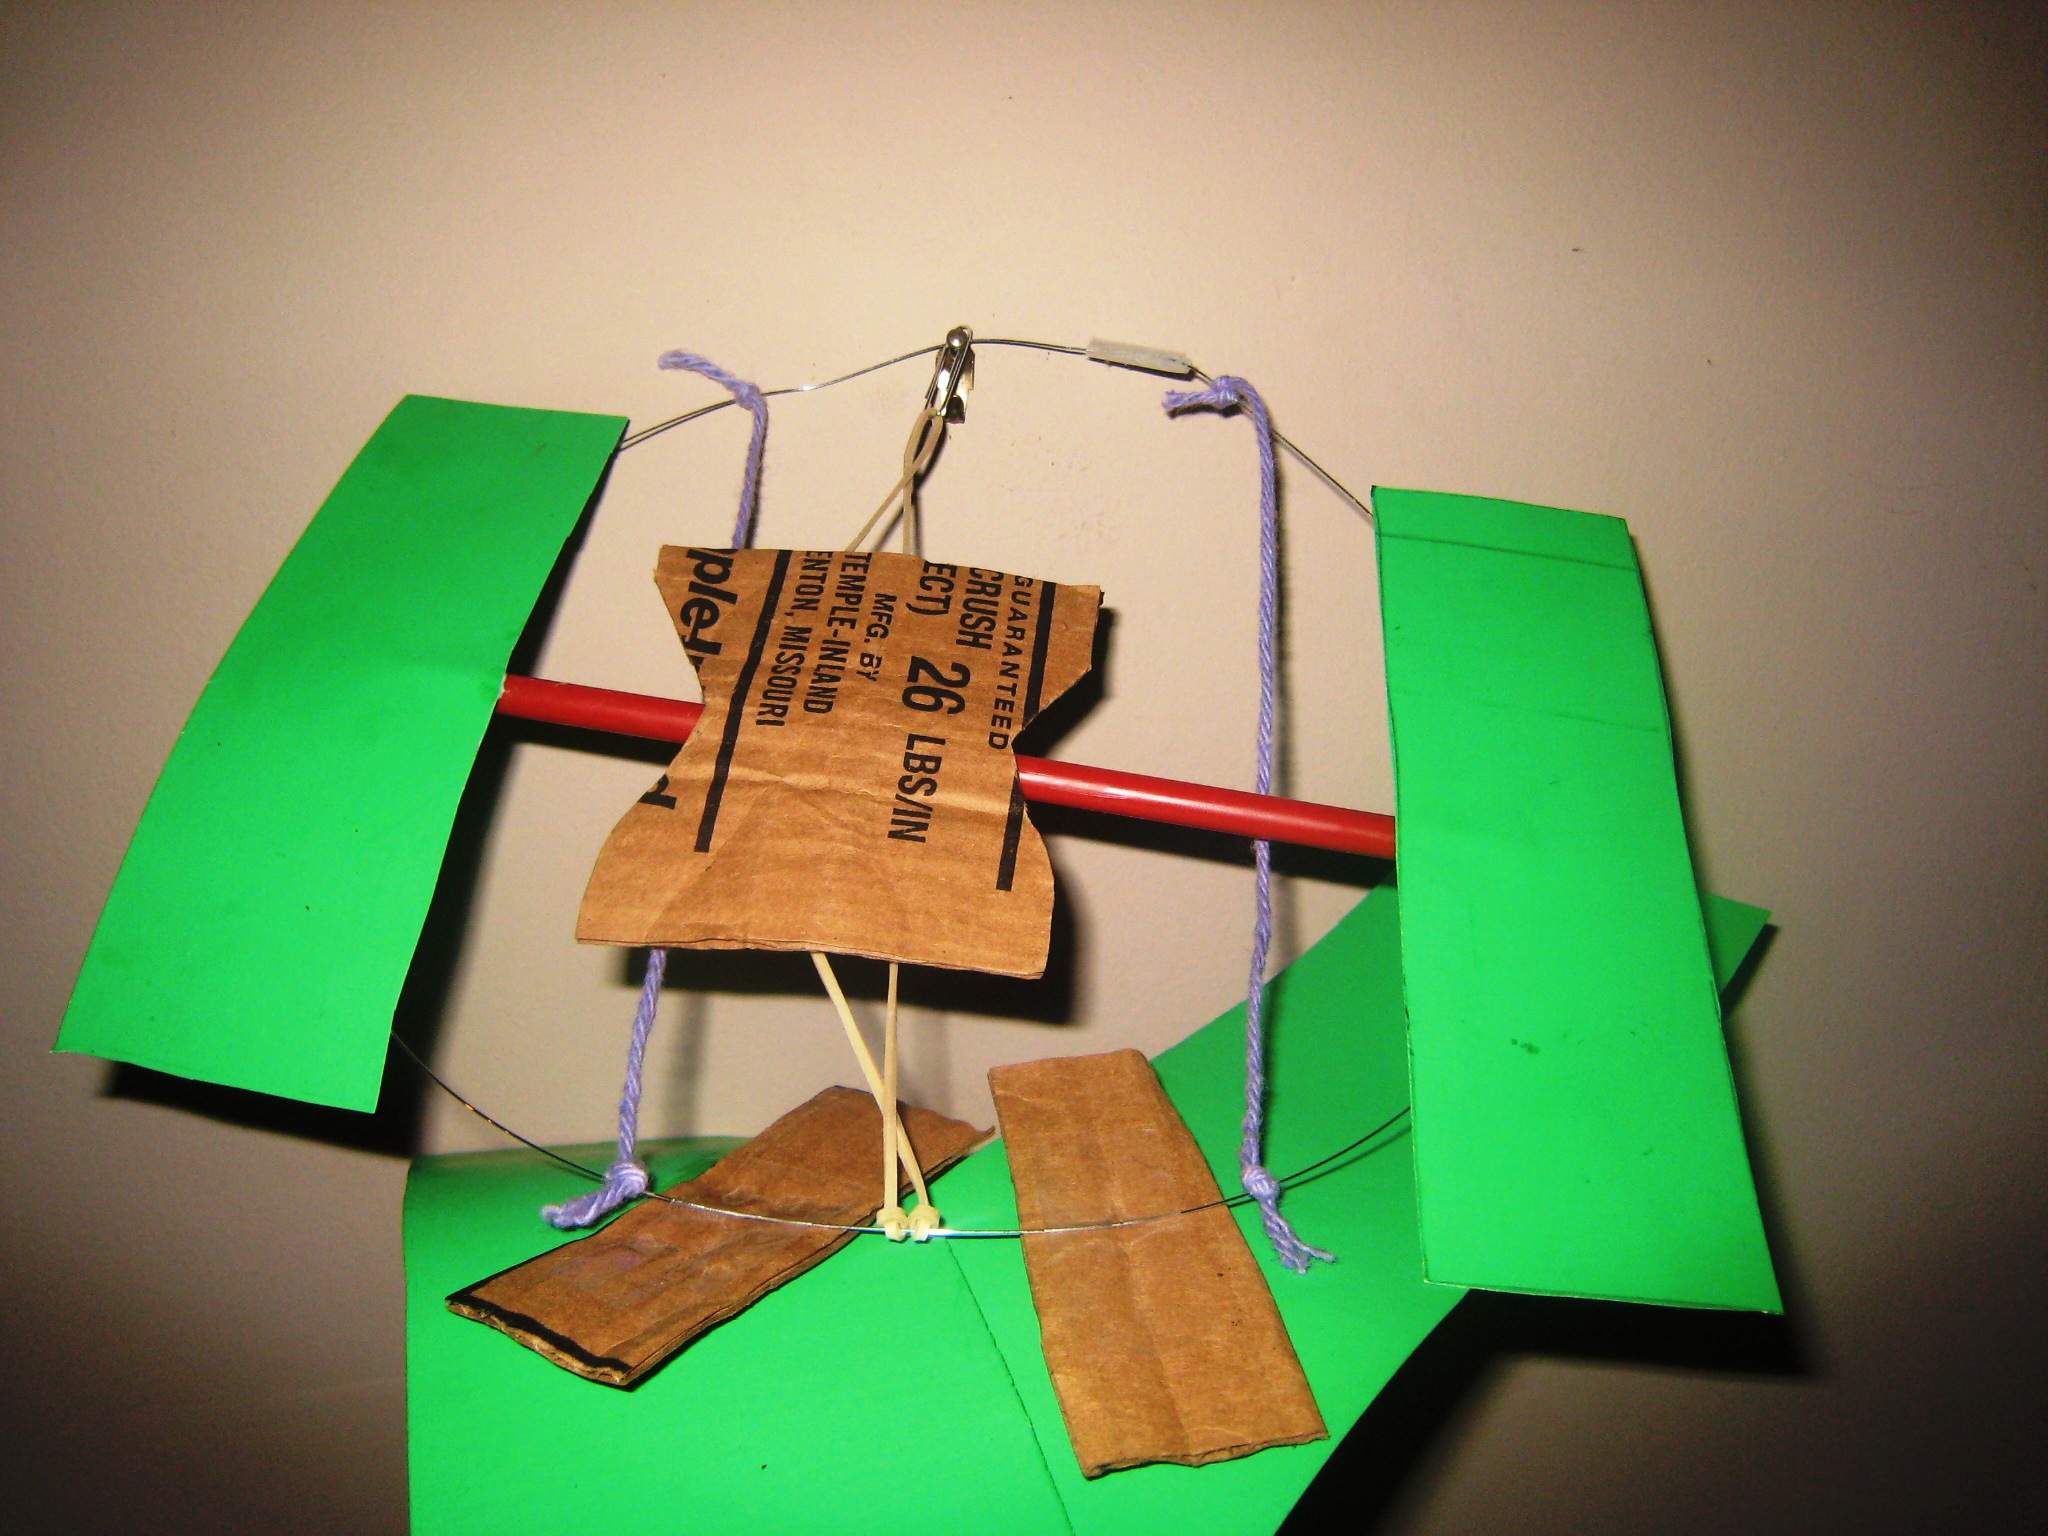
Step One: Make the wire into a loop and tape the ends together.

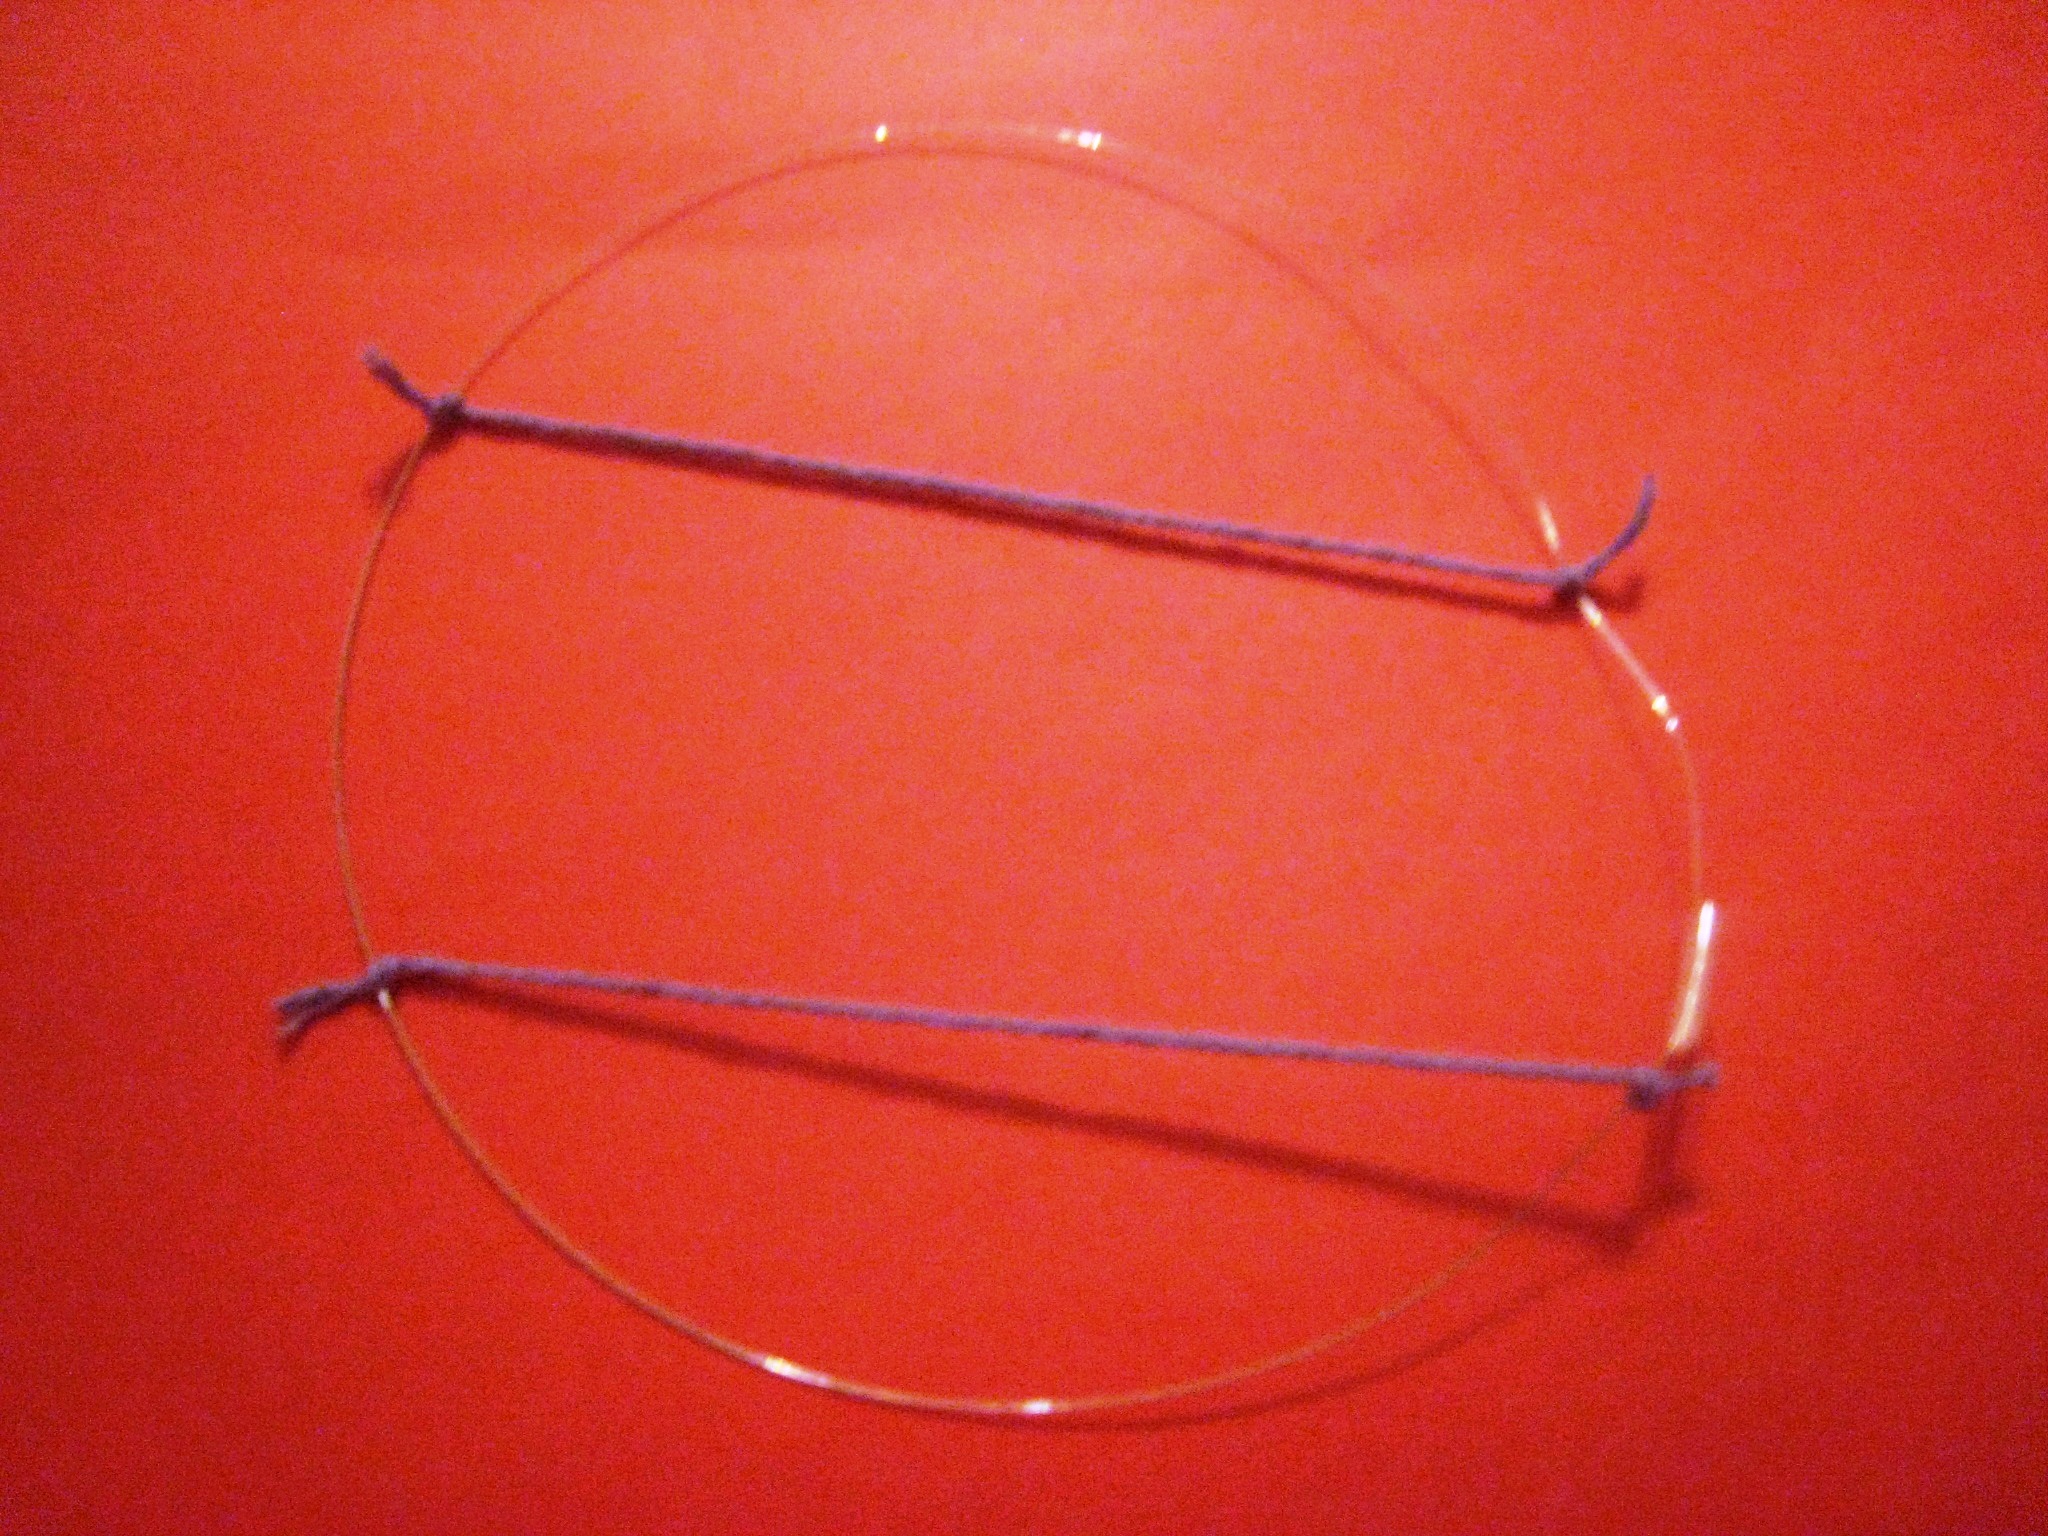
Step Two: Tie two pieces of string from one side of the loop to the other, one towards the top and one towards the bottom. This will help keep your loop from becoming disfigured when it’s time to fly.
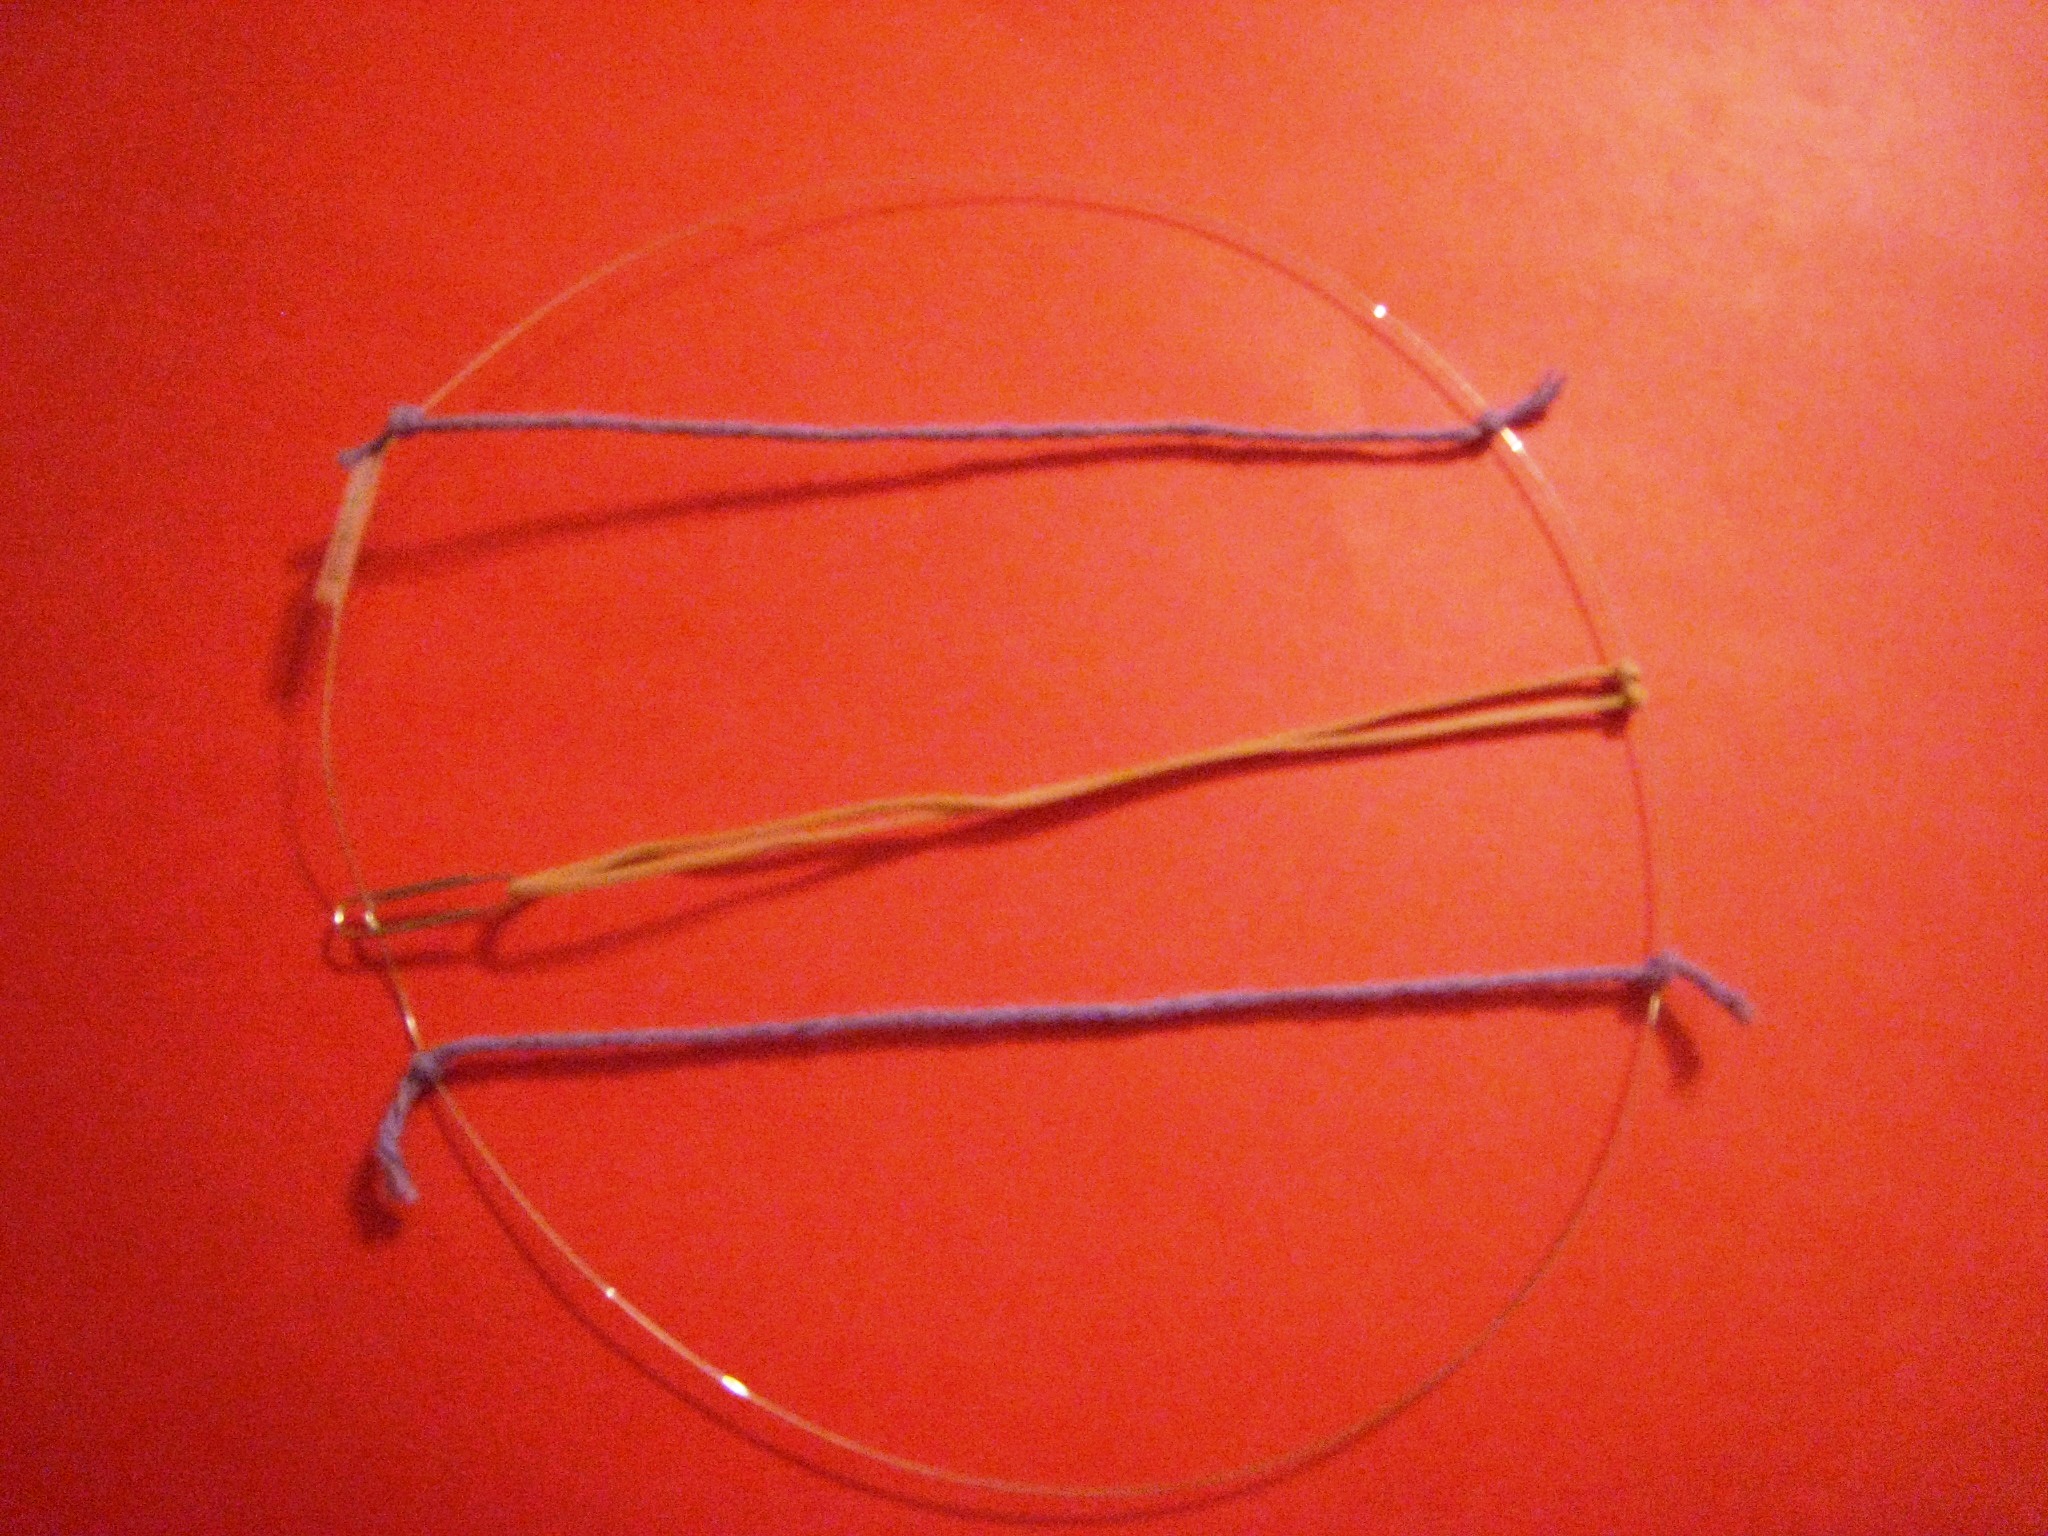
Step Three: Loop the rubber band around the middle of one side of the loop to attach it. Use the paper clip to attach it to the middle at the other end. This should be parallel and in between the two pieces of string.
Step Four: Cut two 3×12-inch strips from the paper and two 2×3-inch strips. These will be the wings. Use the cardboard to make a 3×3-inch butterfly shape for the rotor and two 1×3-inch strips that will be tabs.
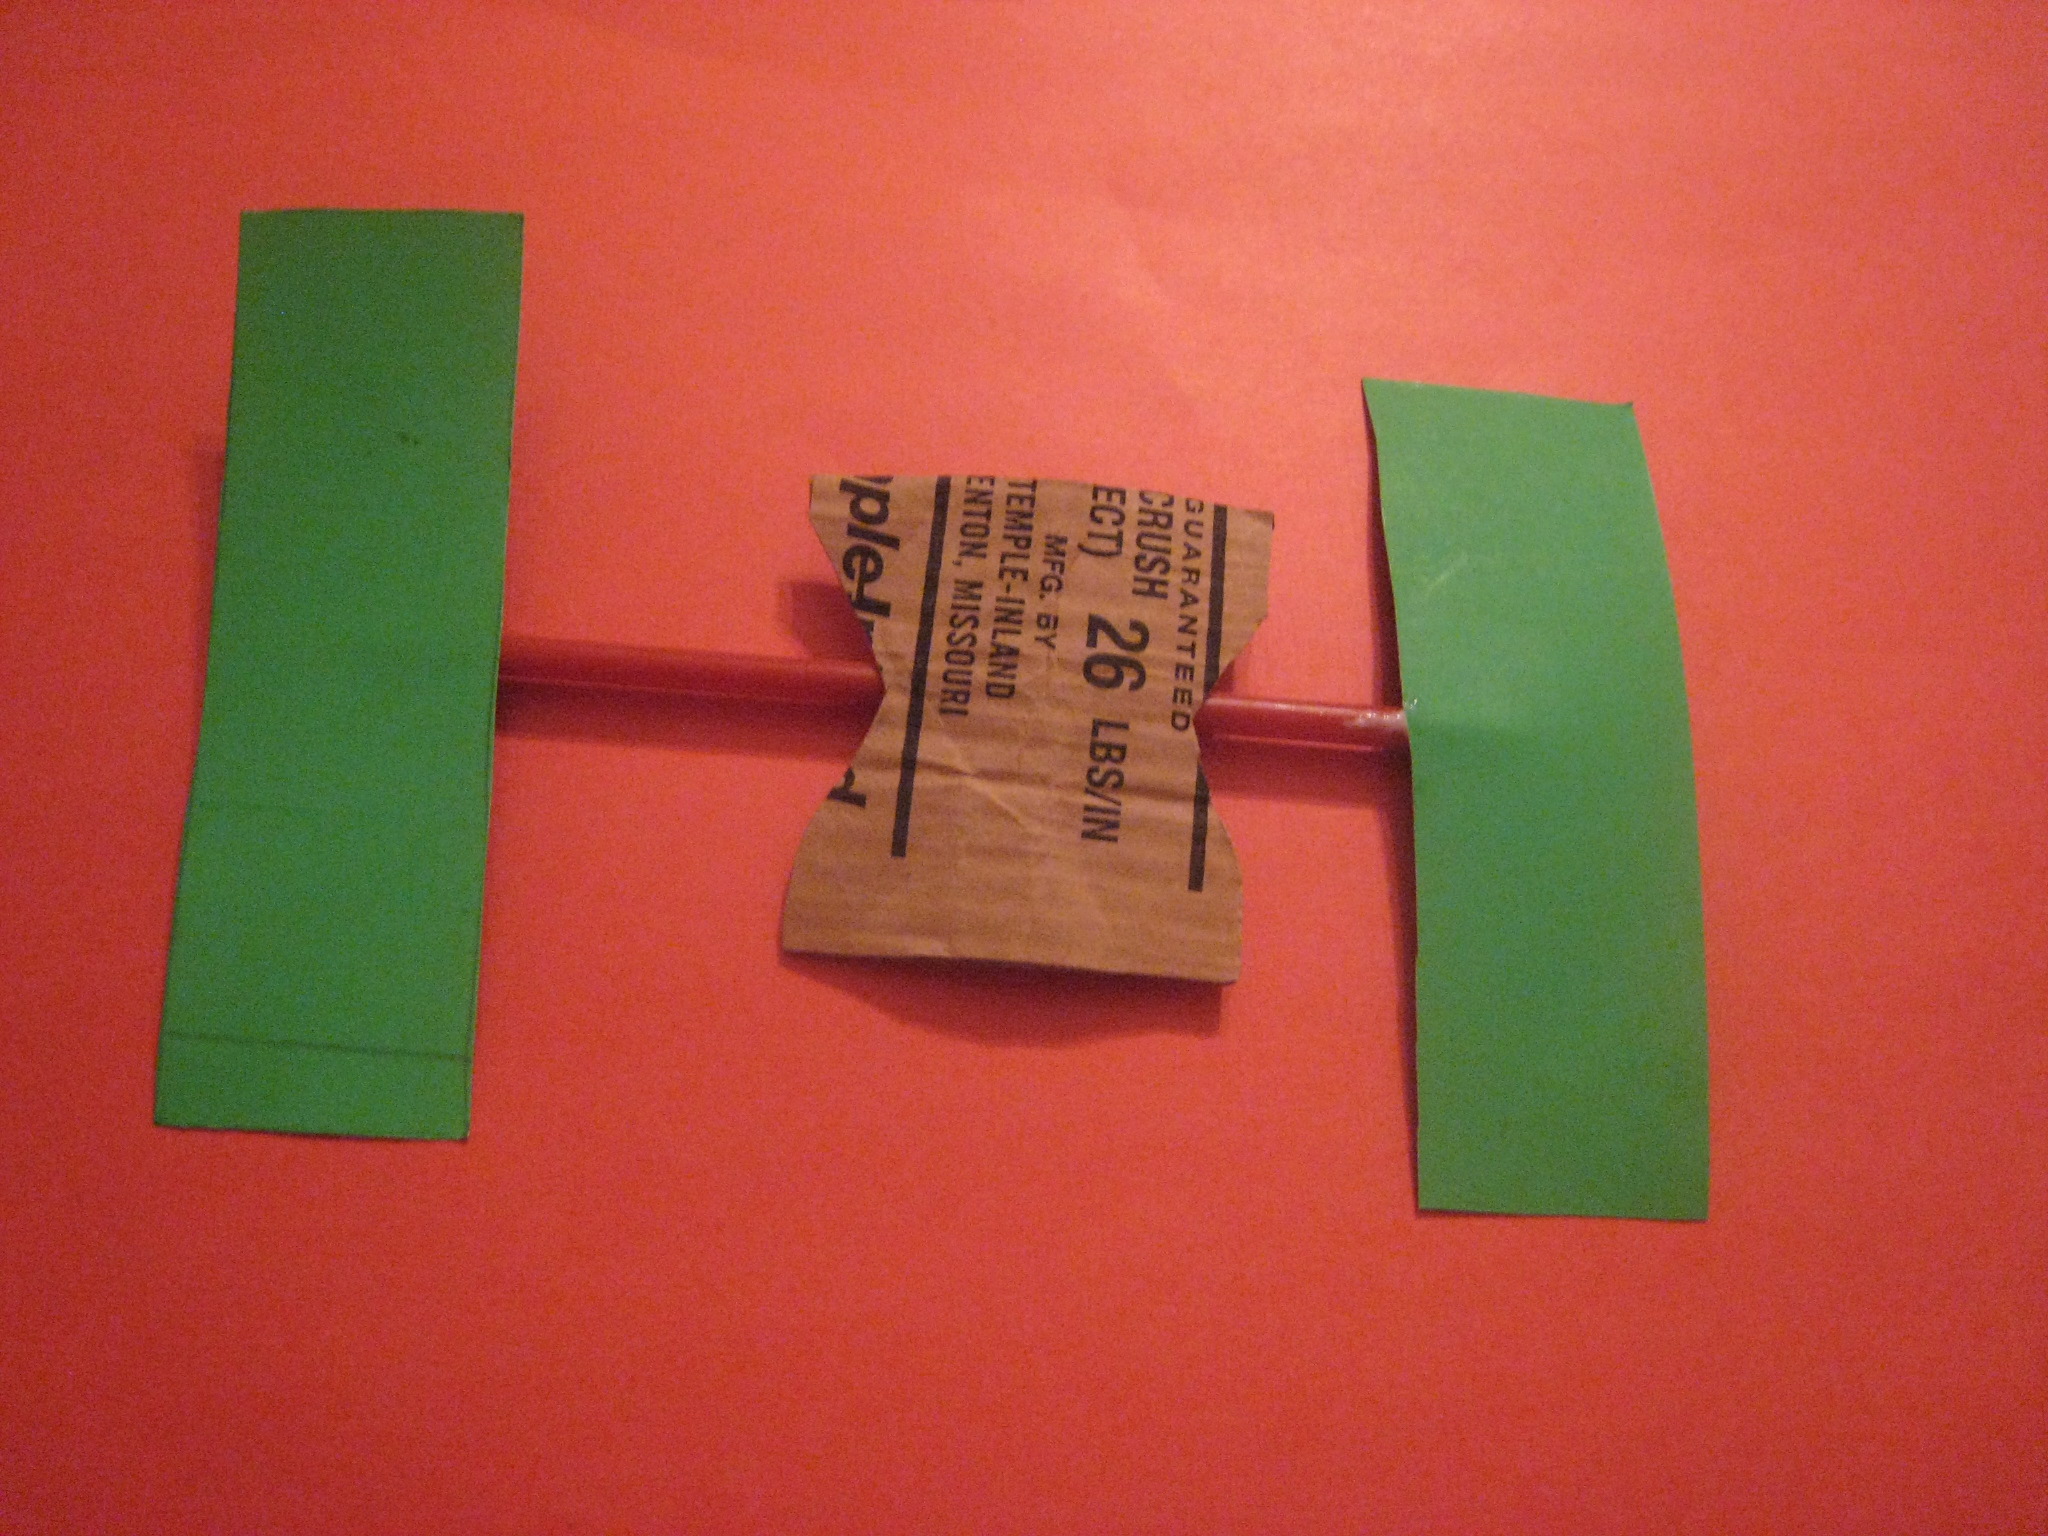
Step Five: Using glue, attach the 3×6-inch strips to either end of the straw. Glue the butterfly shaped rotor to the middle.

Step Six: On either side of the rubber band, tape one of the 1×3-inch strips. Glue the ends of the 3×12-inch strips to each of the tabs, so that they extend at a 30-degree angle on either side of the rubber band.
Your helicopter is now ready to take off! To make it fly, hold the bottom of the loop with your index finger and thumb and insert the rotor between the strands of the rubber band. Wind it about 50 times without letting it recoil. Once the rotor has gathered enough force from the tension in the rubber band, toss your copter in the air and watch it soar right up to the ceiling!
How it works: The force from the recoil of the rubber band makes the rotor spin rapidly which creates enough force under the two longer wings to push the helicopter up.